Once you have created your SMS and before you schedule your SMS campaign, the next step is to create a contact list.
Creating a contact list
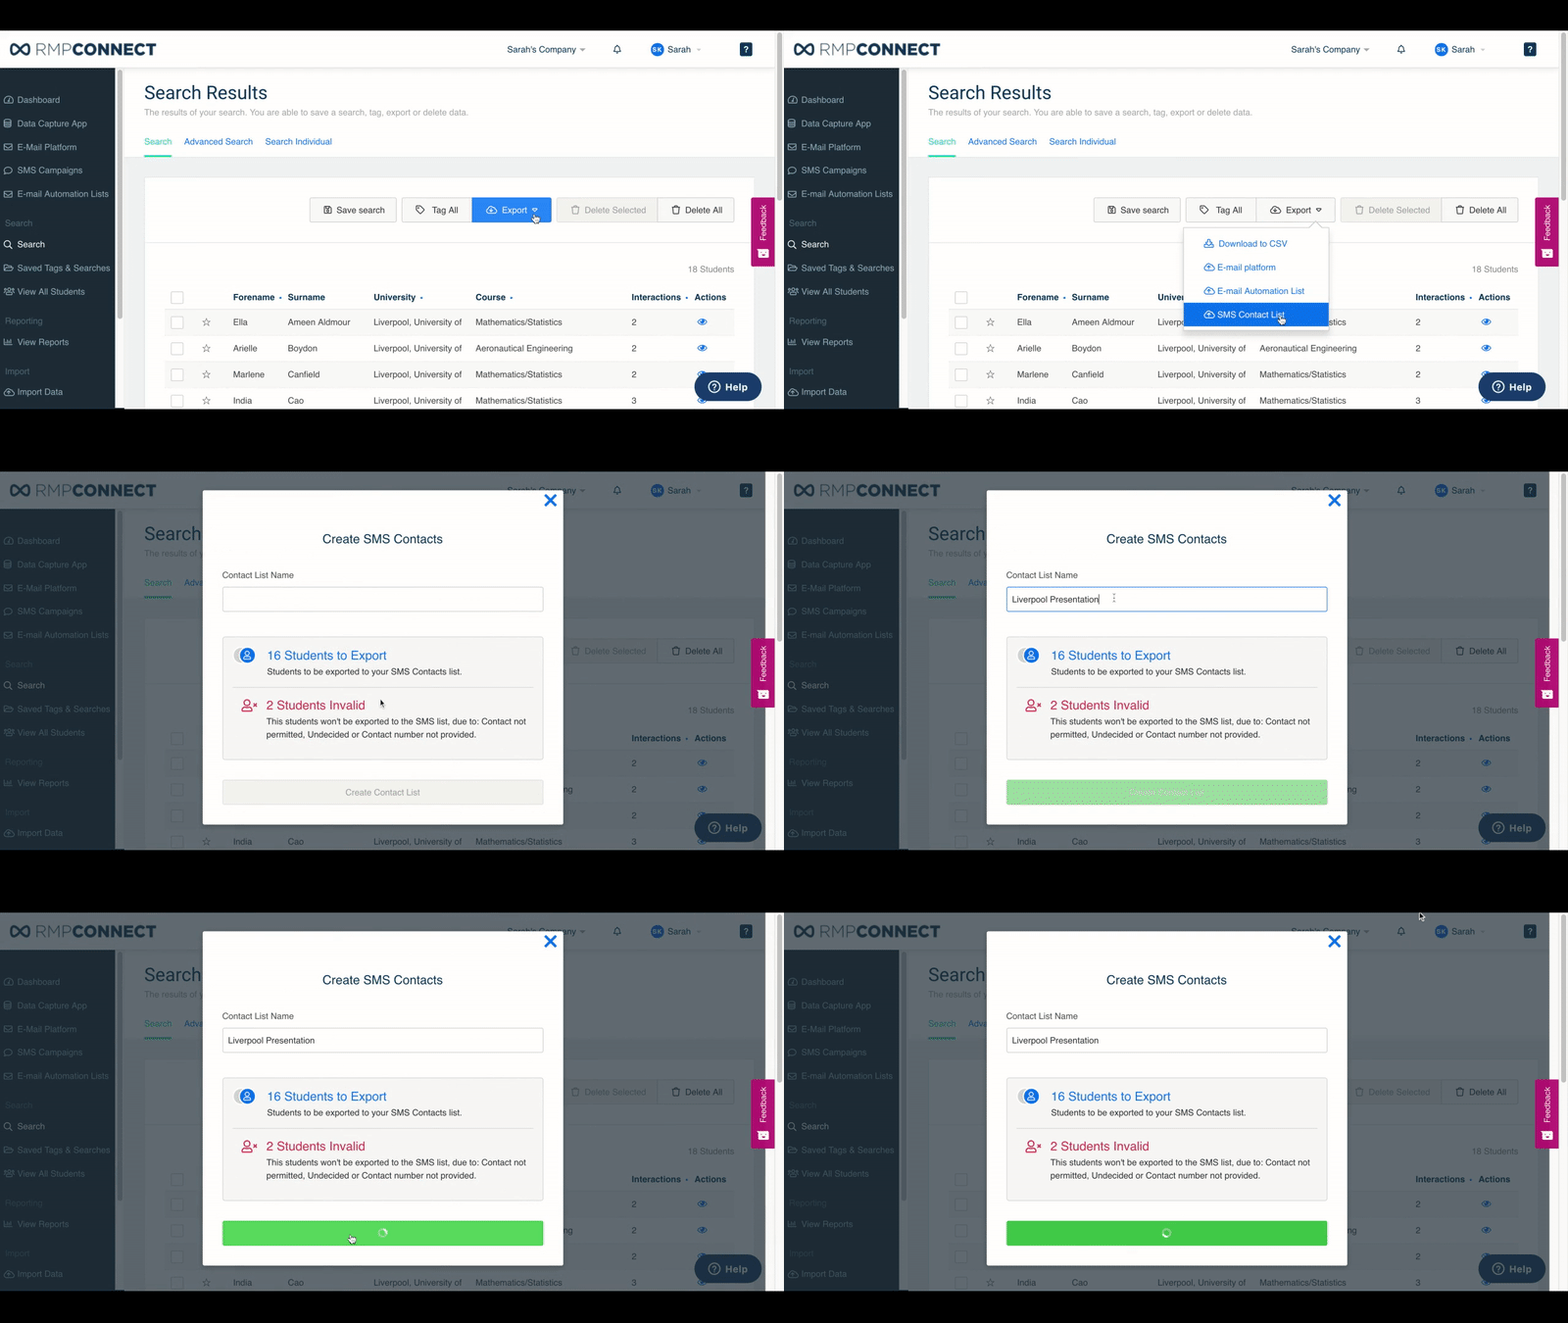
- Use the Search feature as you would normally (click here for more information on the Search feature)
- Start by selecting Search on the left of the screen
- Create a search based on the relevant criteria, e.g. Graduation Year 2021, studying at Oxford University, etc. then hit the green Search button
- Hit the Export button
- Select SMS Contact List
- A pop up window will appear where you can name the Contact List and you can see which of your students have opted into contact
- Students who haven't opted in for SMS contact will not be included
- Select Create Contact List and you will then be able to view this in the SMS Campaigns section under Contact Lists

You can now create an SMS campaign
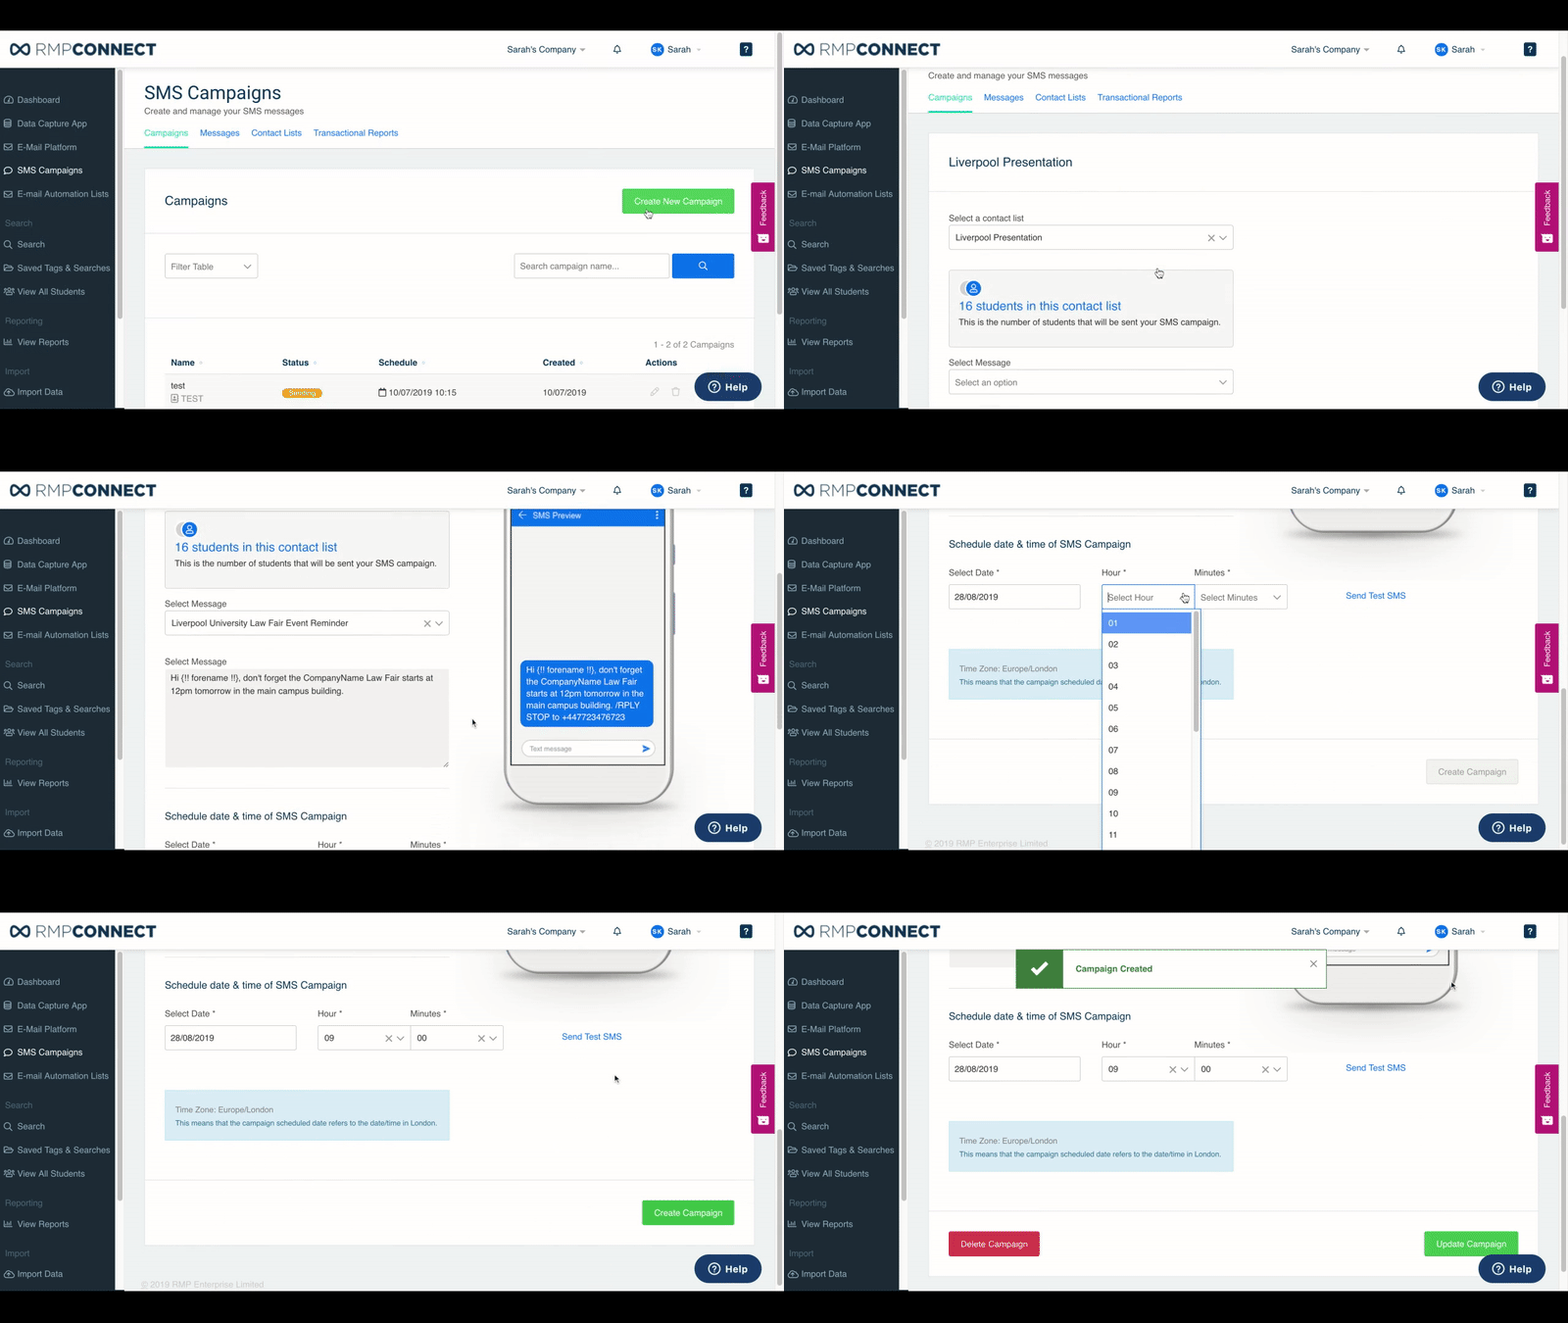
- Select SMS Campaigns
- Under the Campaigns tab, select Create New Campaign
- Select a contact list from the drop down menu
- Then select your SMS message from the next drop down menu
- Scroll down and you can send yourself another test SMS if you need
- To schedule your SMS, select a date and time from the drop down menus and select Create Campaign

Editing or Deleting Campaigns
- To view campaigns go back to Campaigns tab where you can view all campaigns (you can filter based on sending status or search a campaign by name)
- To edit a Scheduled campaign, select the Edit symbol
- From here you can edit the contact list, message contact and date/time and then you should select Update Campaign
- You can Delete a Scheduled Campaign from this view or back on the Campaigns tab by selecting the Delete symbol and Delete in the pop up window