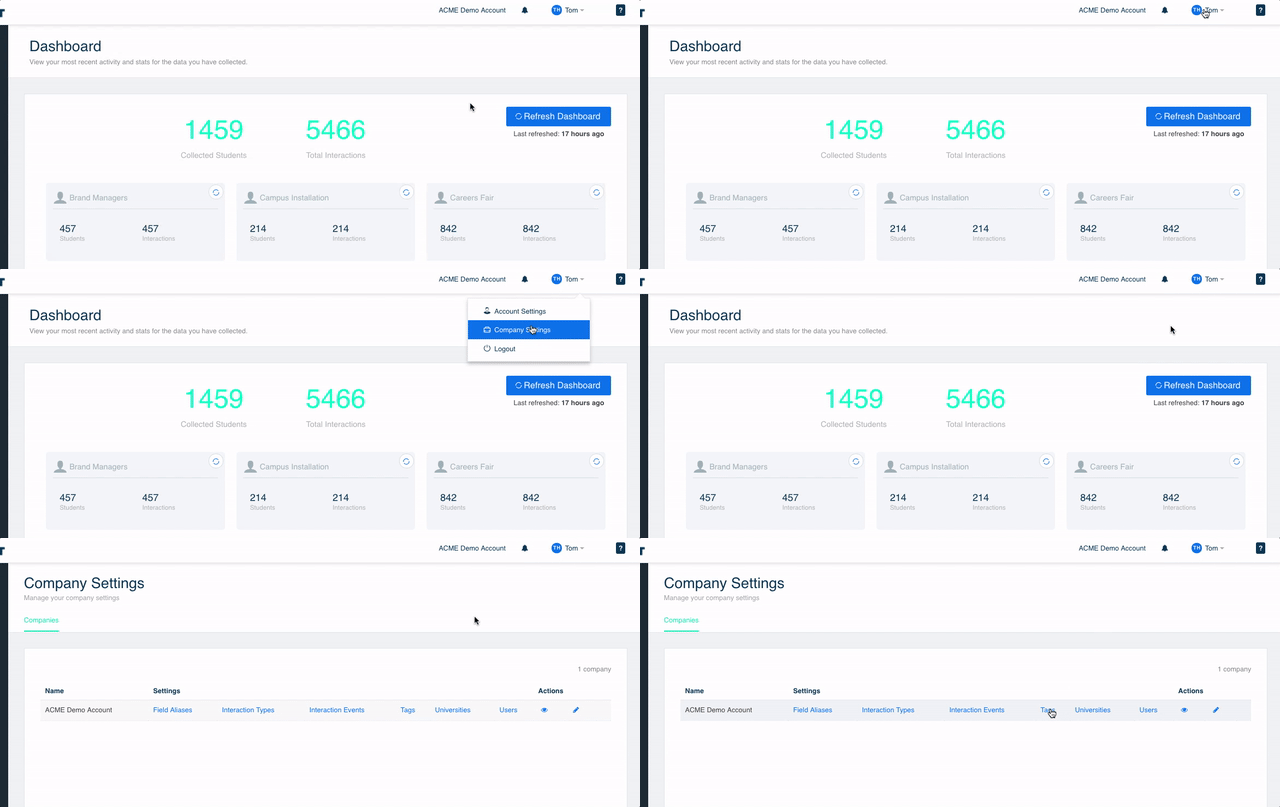
In your company settings, you can manage your Tags. This means you can edit the names of your Tags and also show/hide them from your dashboard.
Tags are used for grouping students that have a particular characteristic. Tagging up a group of students will give you easy access to them on the RMP Connect dashboard.
To manage your Tags you need to do the following:
- Go to the RMP Connect Dashboard.
- In the top right, it says your name, click it and select "Company Settings" from the dropdown.
- It will bring up a number of options, select "Tags".

To edit your Tags you need to do the following:
- Scroll down to the Tag you would like to edit.
- Select the pencil icon on right.
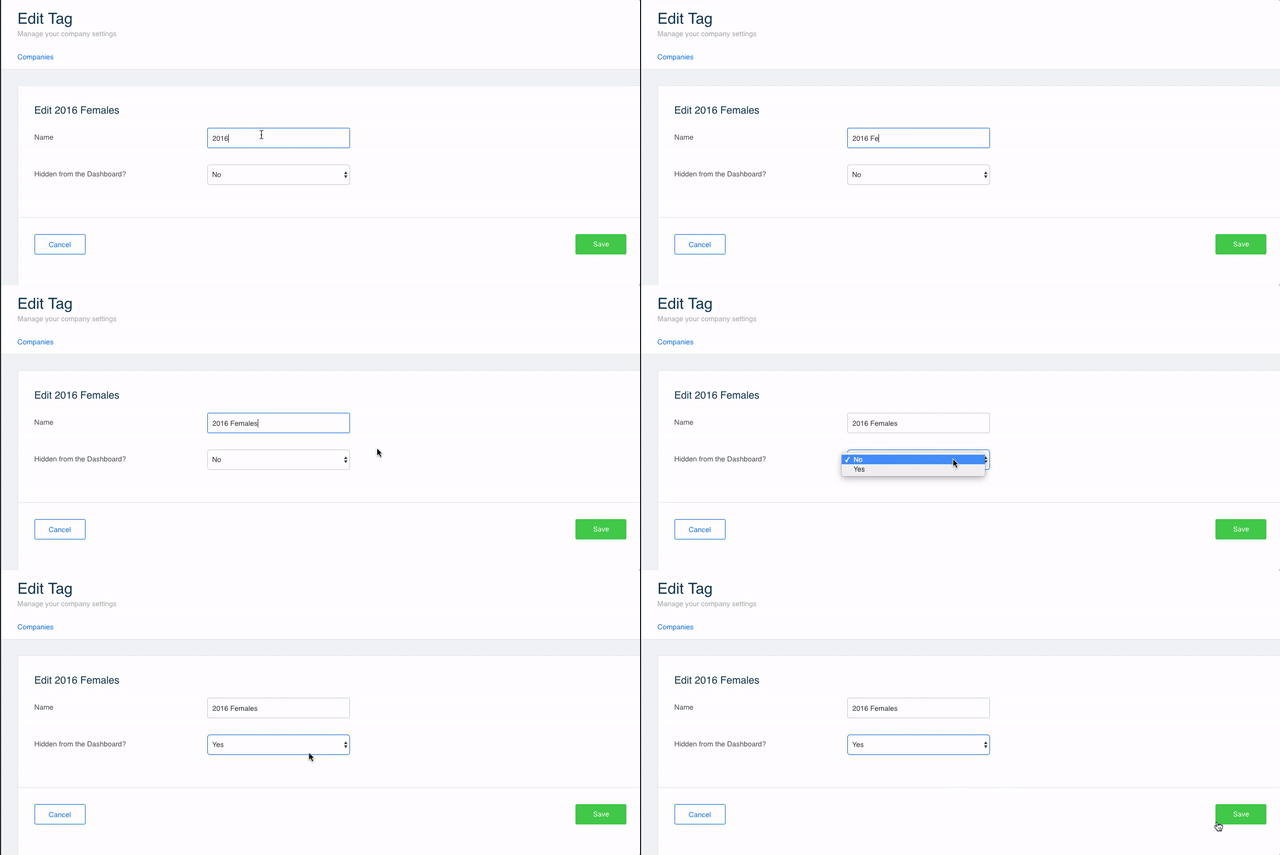
- Type the new name for your Tag.
- Hit "Save".
To hide/show your Tags you need to do the following:
- Scroll down to your Tag.
- Select the pencil icon on right.
- Select "Yes/No" from the "Hidden from the Dashboard?" dropdown.
- Click "Save".
